Attachments are the simplest way to provide additional information to your clients. You can add attachments to any Shared item. You can also pin any attachment, which turns it into a prompt to really get your client's attention.
You can add the following types of attachments:
- Link: Any kind of link to a website, file, video, etc.
- Rich Text: Formatted text of any length which can be pinned.
Create an attachment
- 1
- Find the Recipe, Plan, or Collection that you've shared and click the Share button. Be sure to toggle the shared link on.
- 2
-
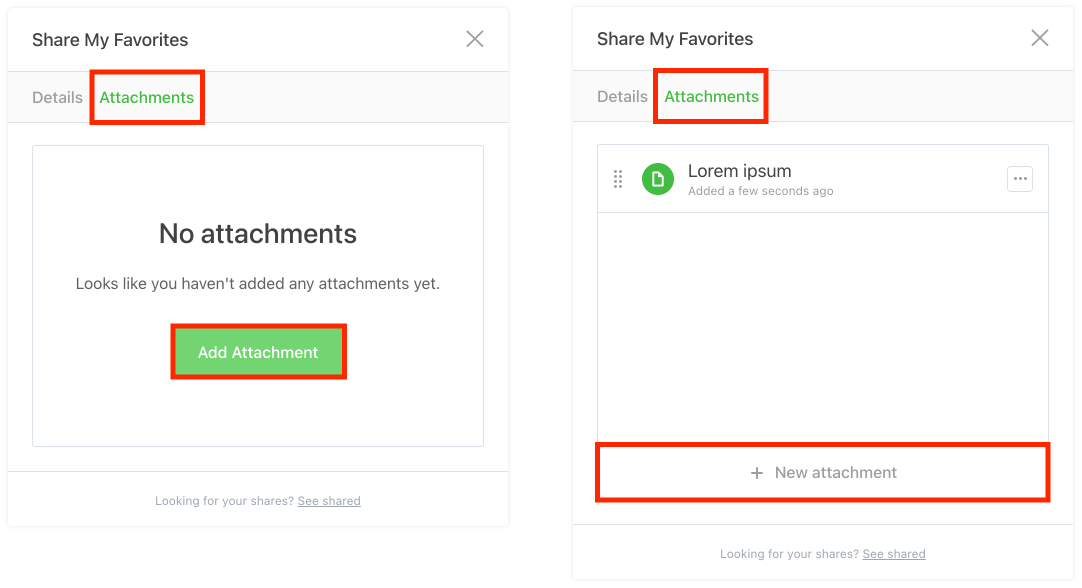
From within the dialog select the
Attachments tab, then click the Add Attachment (or New Attachment) button:
- 3
-
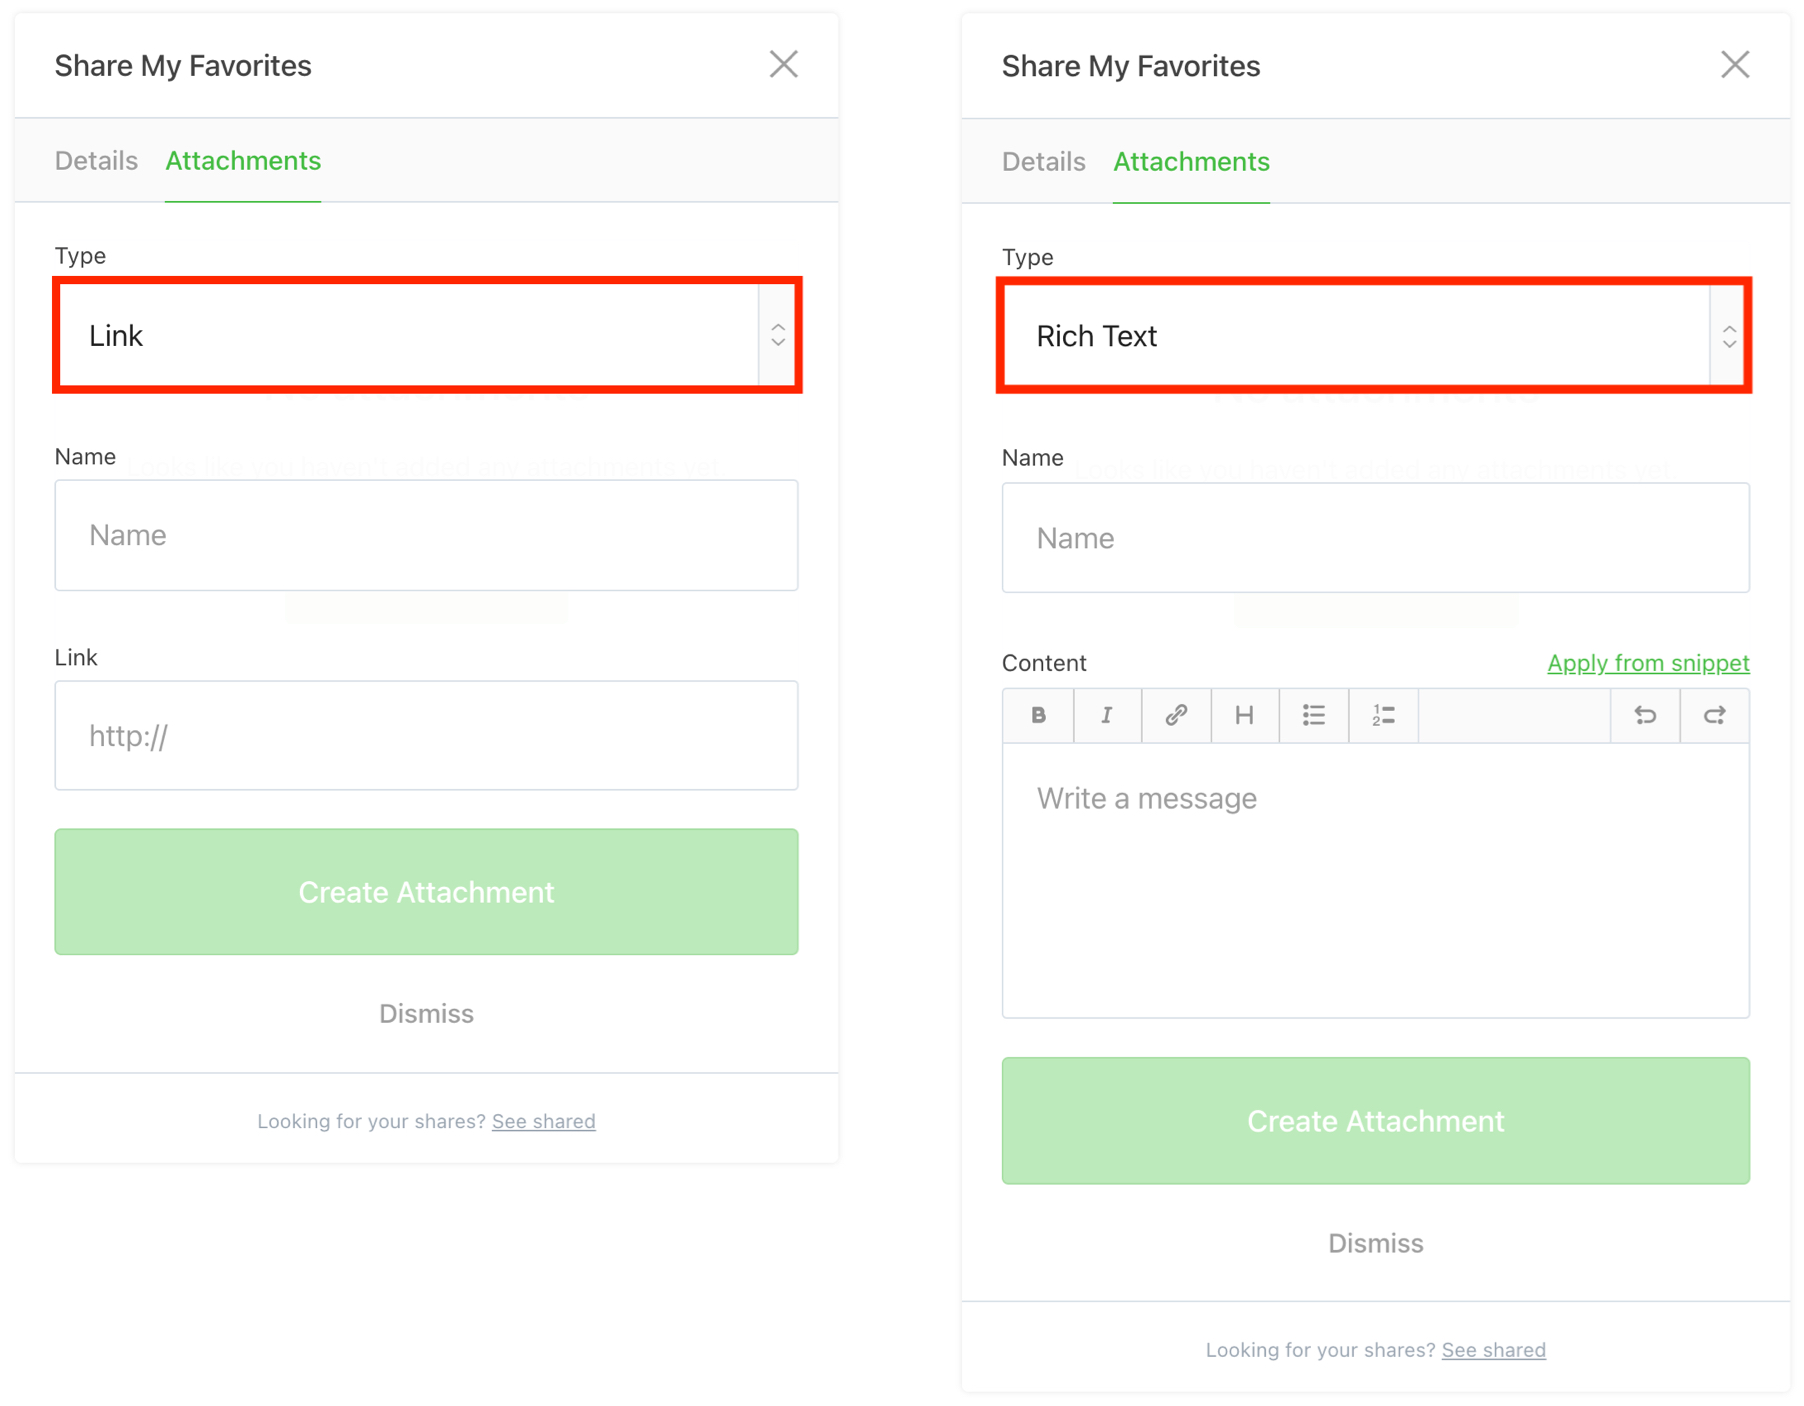
Select the "Type" of attachment you'd like to create (i.e.
Link or Rich Text), provide a "Name" and content such as a valid URL or formatted text, then click the Create Attachment button:
Pin/Unpin an attachment
- 1
-
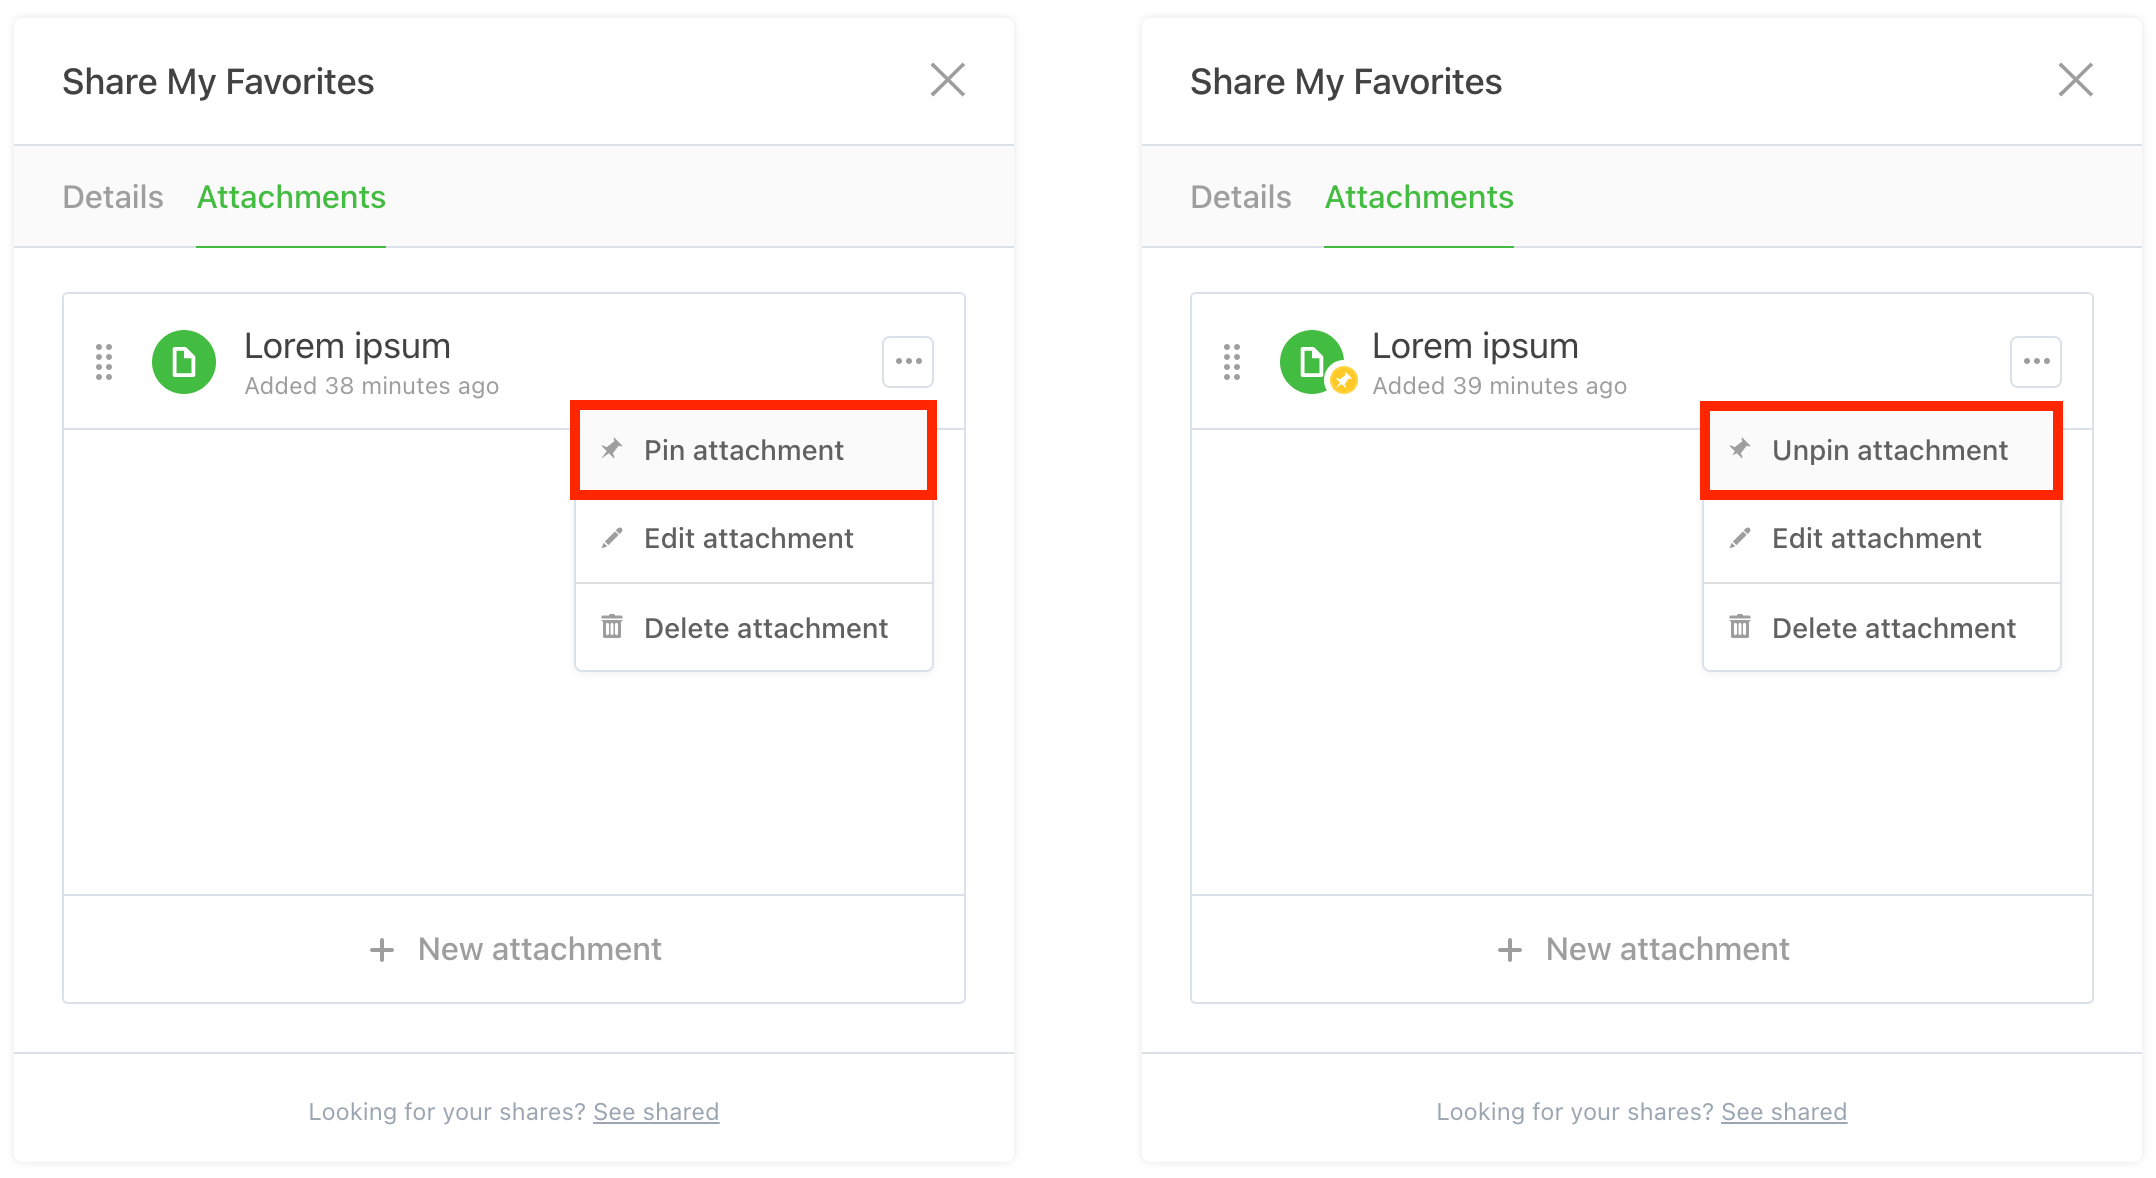
From the
Attachments dialog, click the ••• button corresponding to a rich text attachment you'd like to Pin/Unpin:
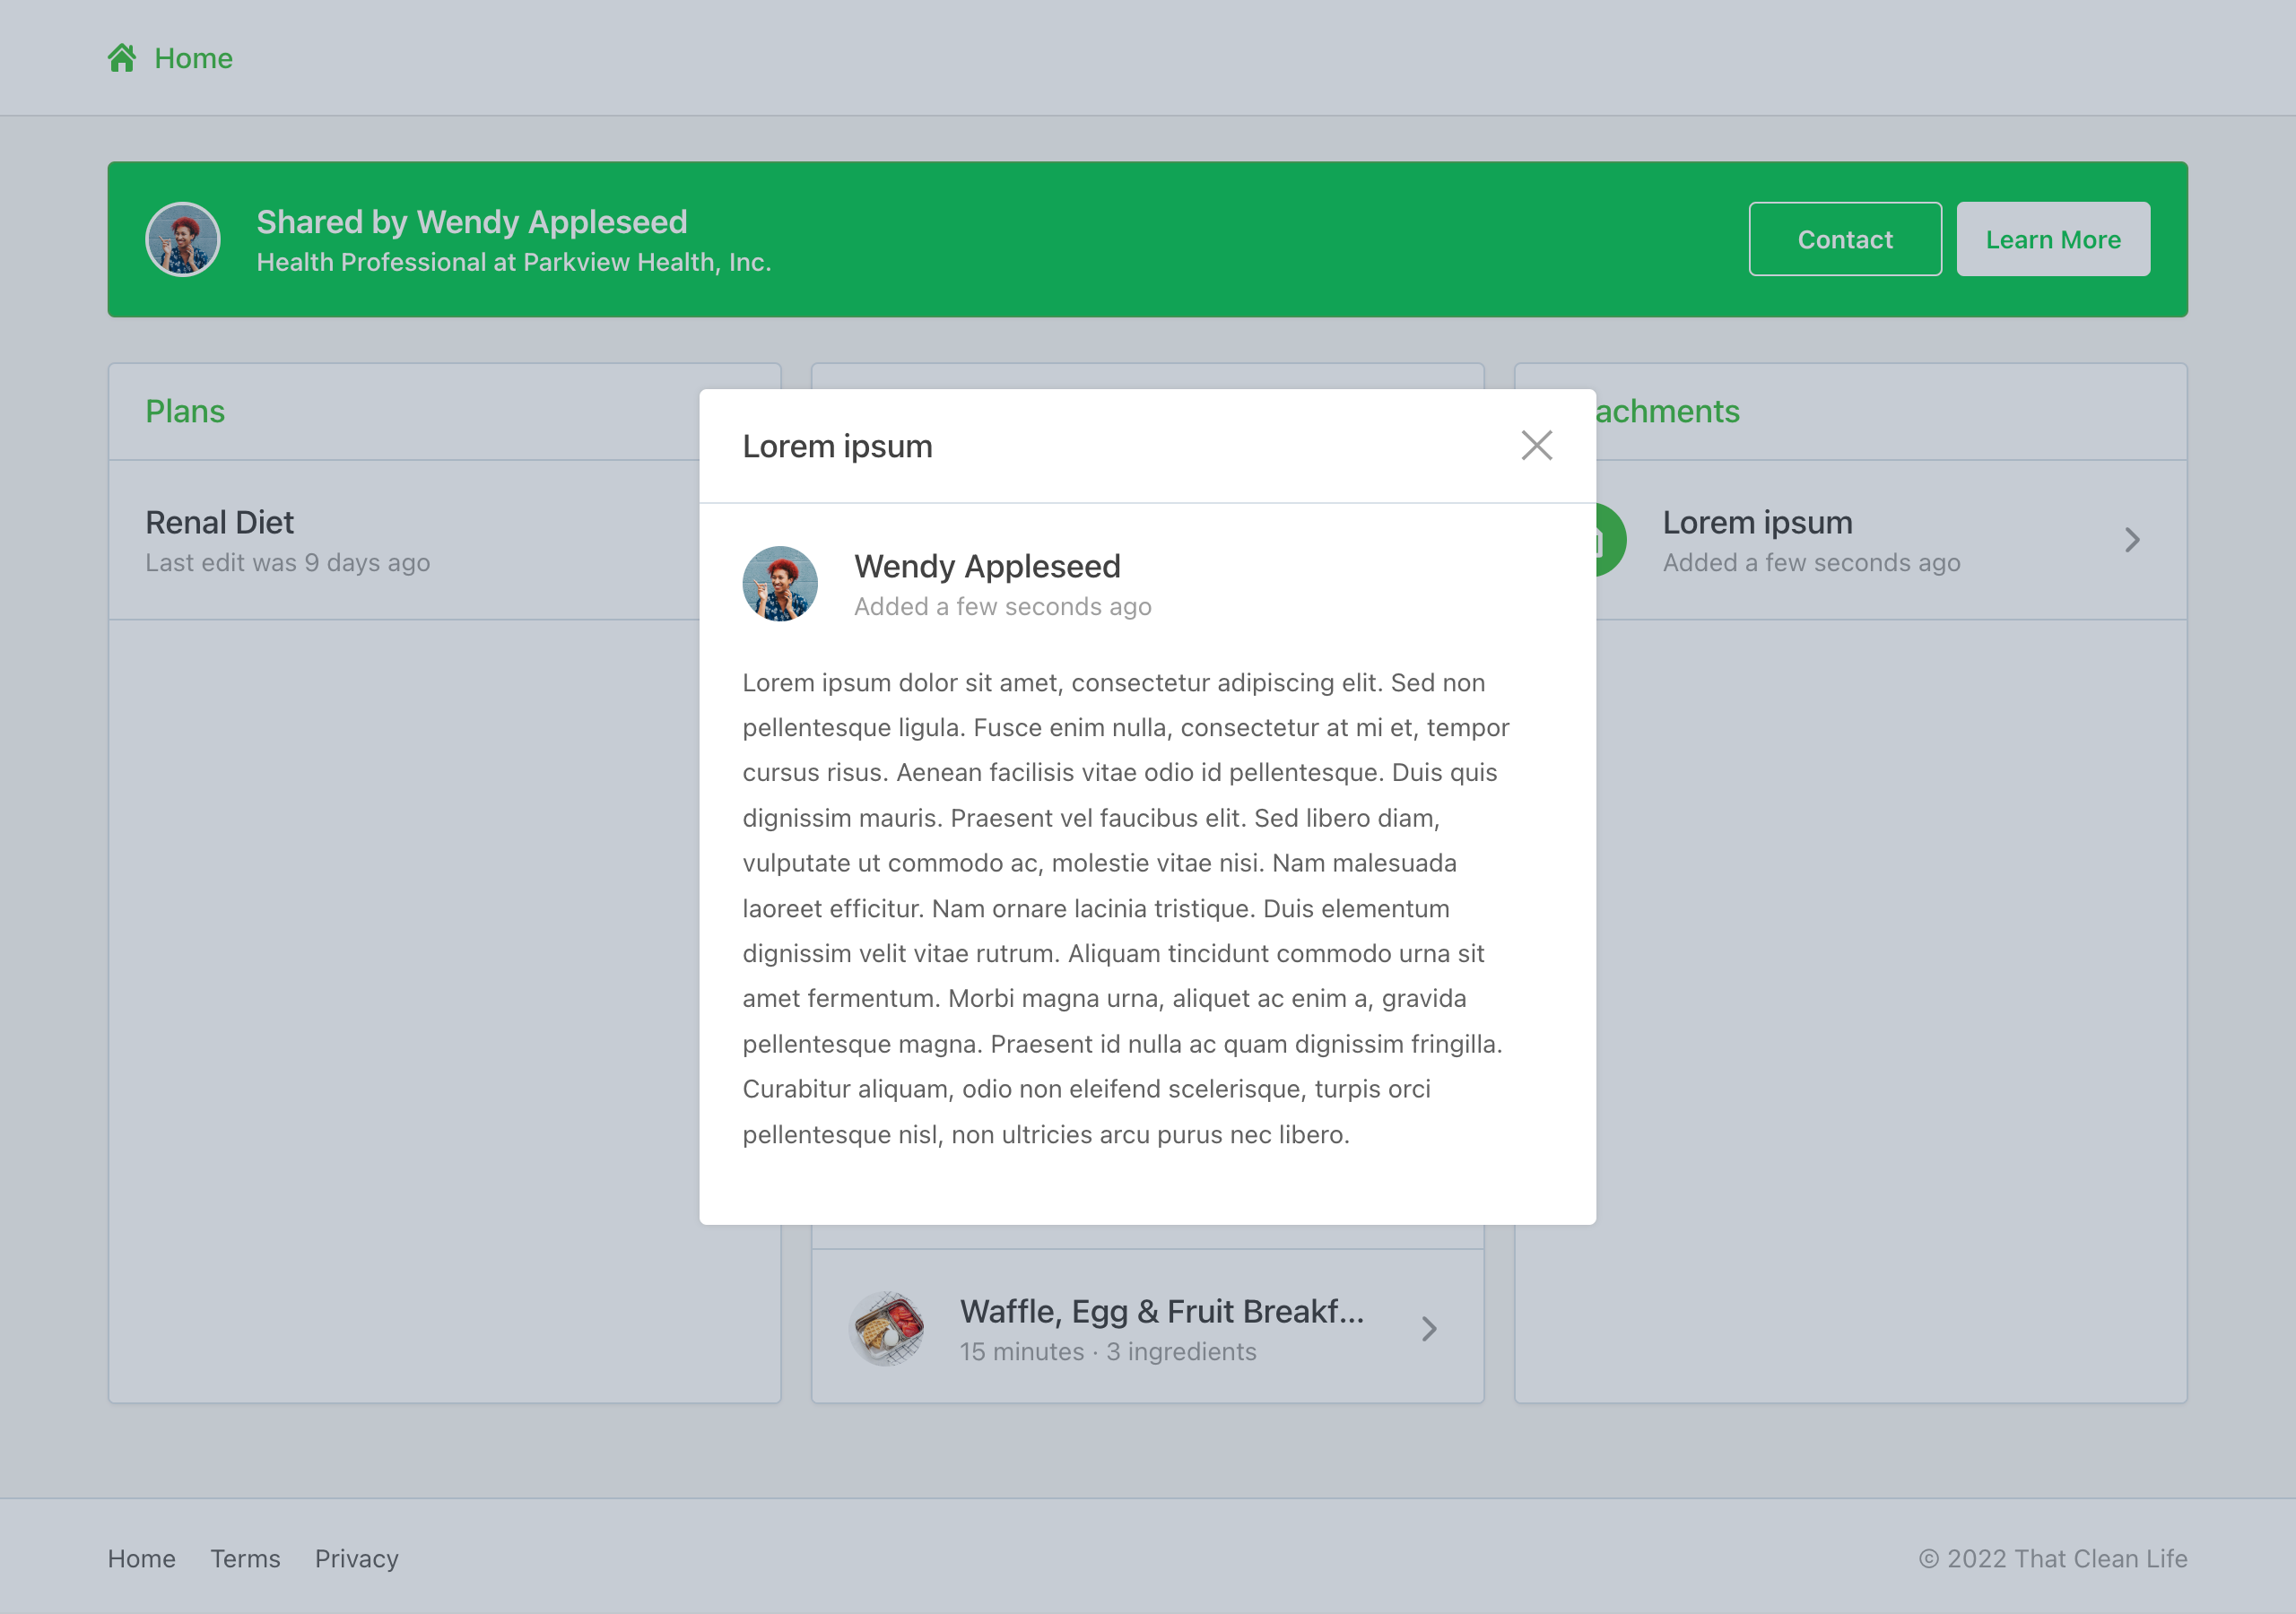
Note
A badge containing a "pin" will be applied to the pinned rich text attachment. Only one rich text attachment can be pinned at a time per shared item. - 2
-
Once a rich text attachment has been pinned it will be converted into a dialog that will prompt all viewers of your respective shared item:
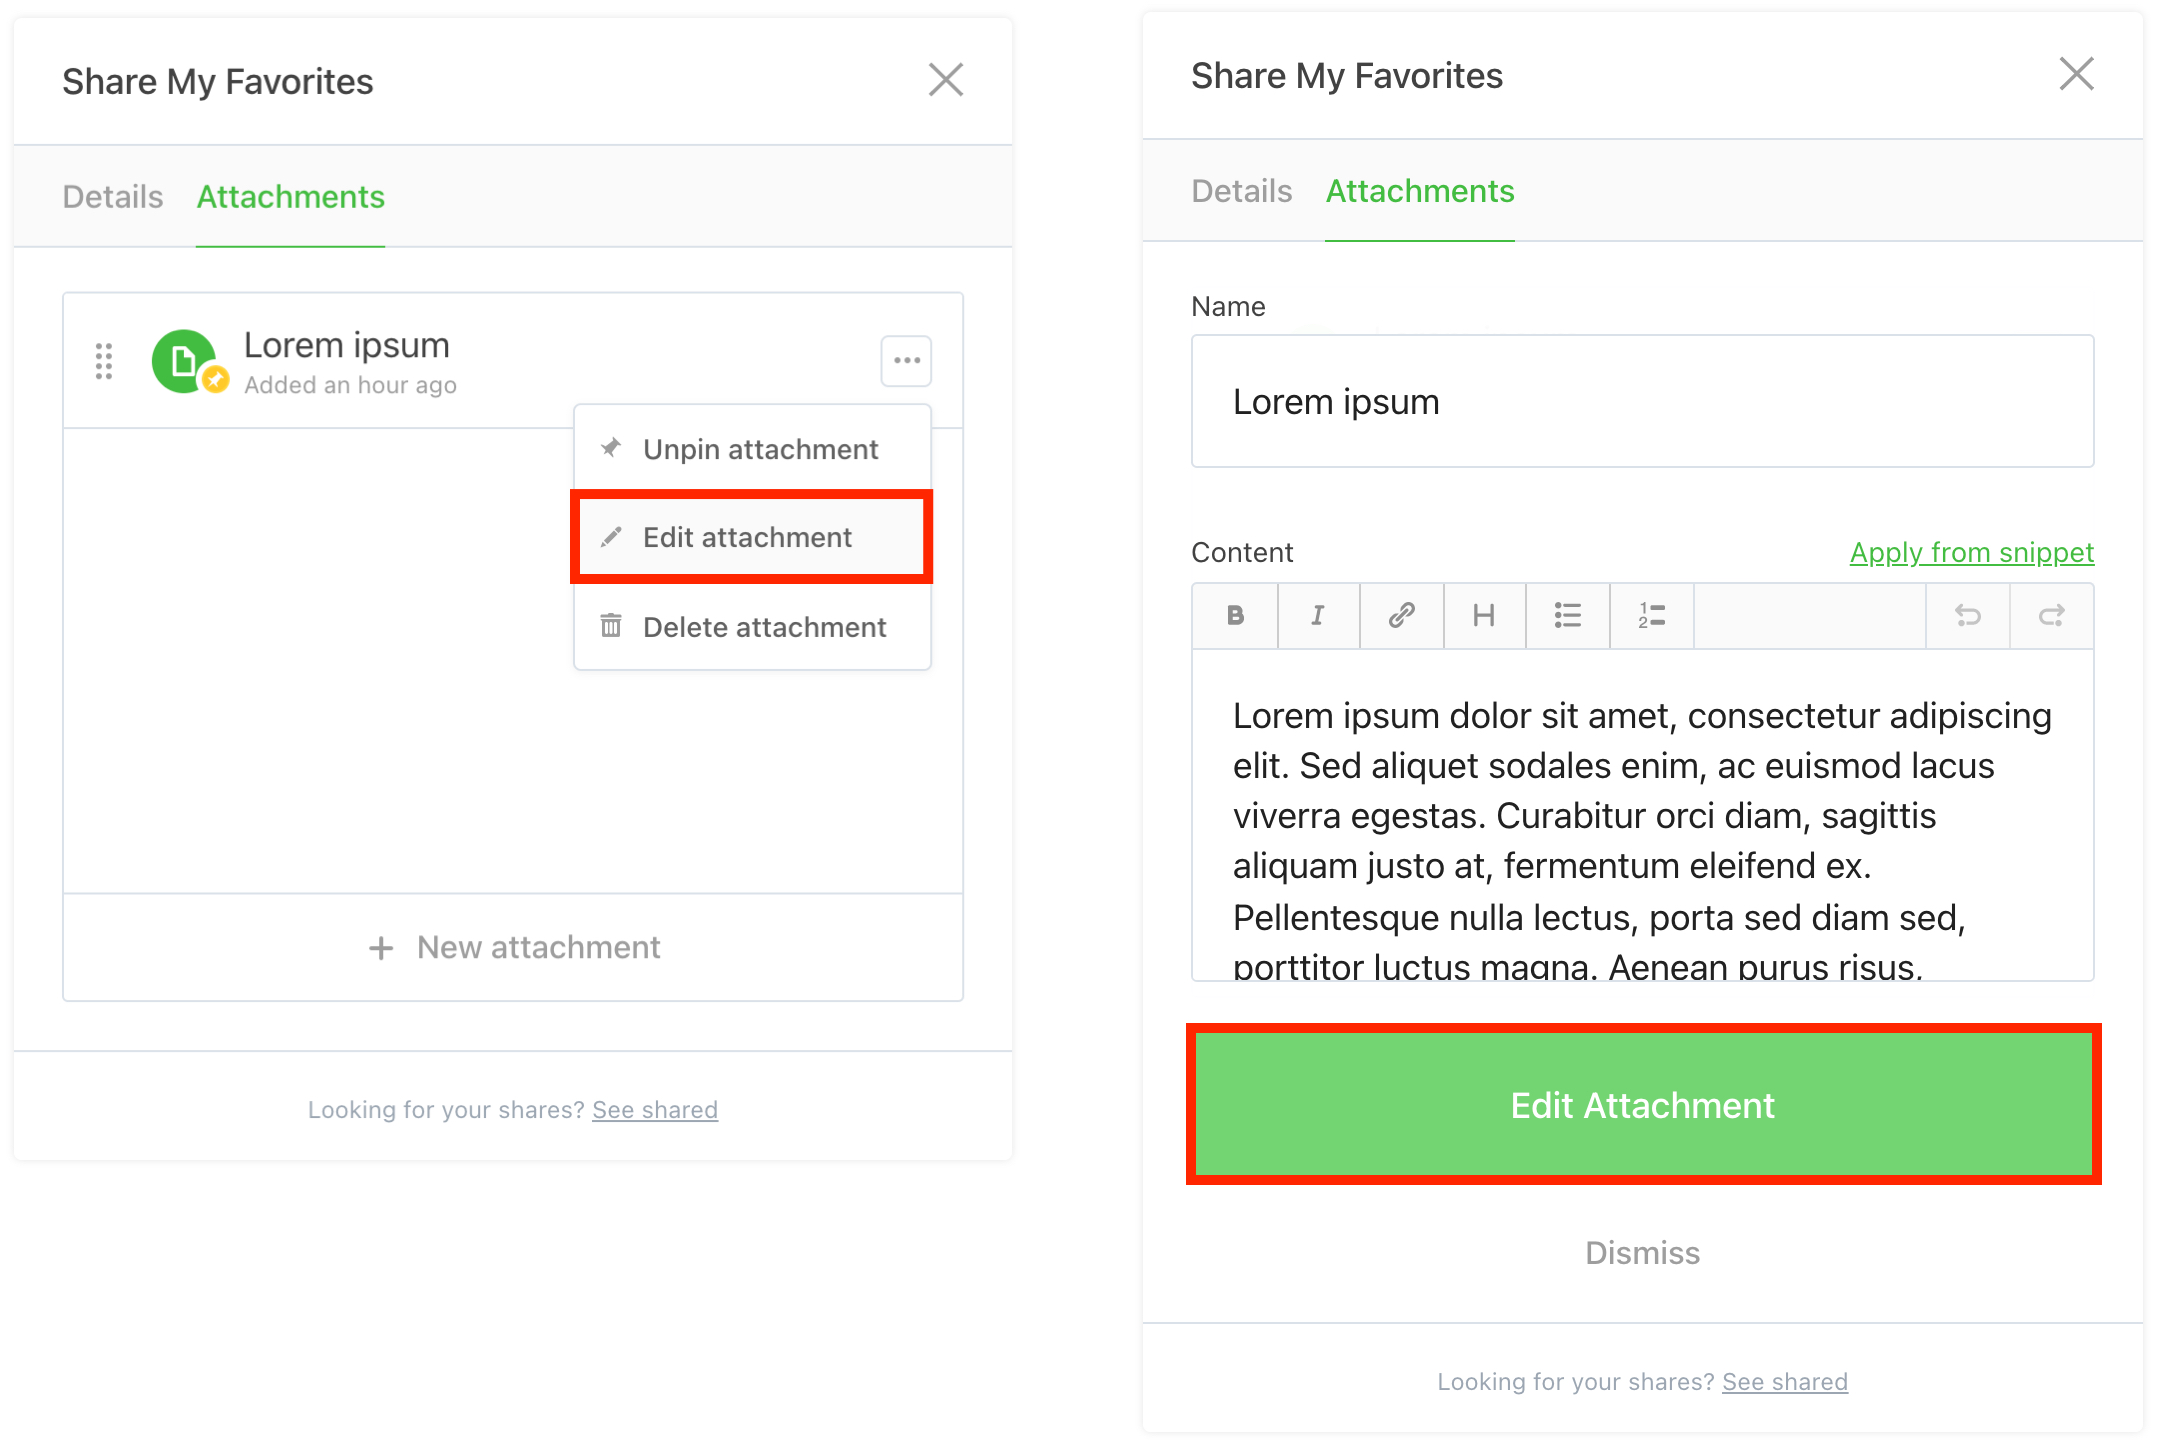
Edit/Delete an attachment
- 1
-
From the
Attachments dialog, click the ••• button corresponding with the attachment you'd like to Edit. Update the "Name", "Link" or "Content", then click the Edit Attachment button:
- 2
-
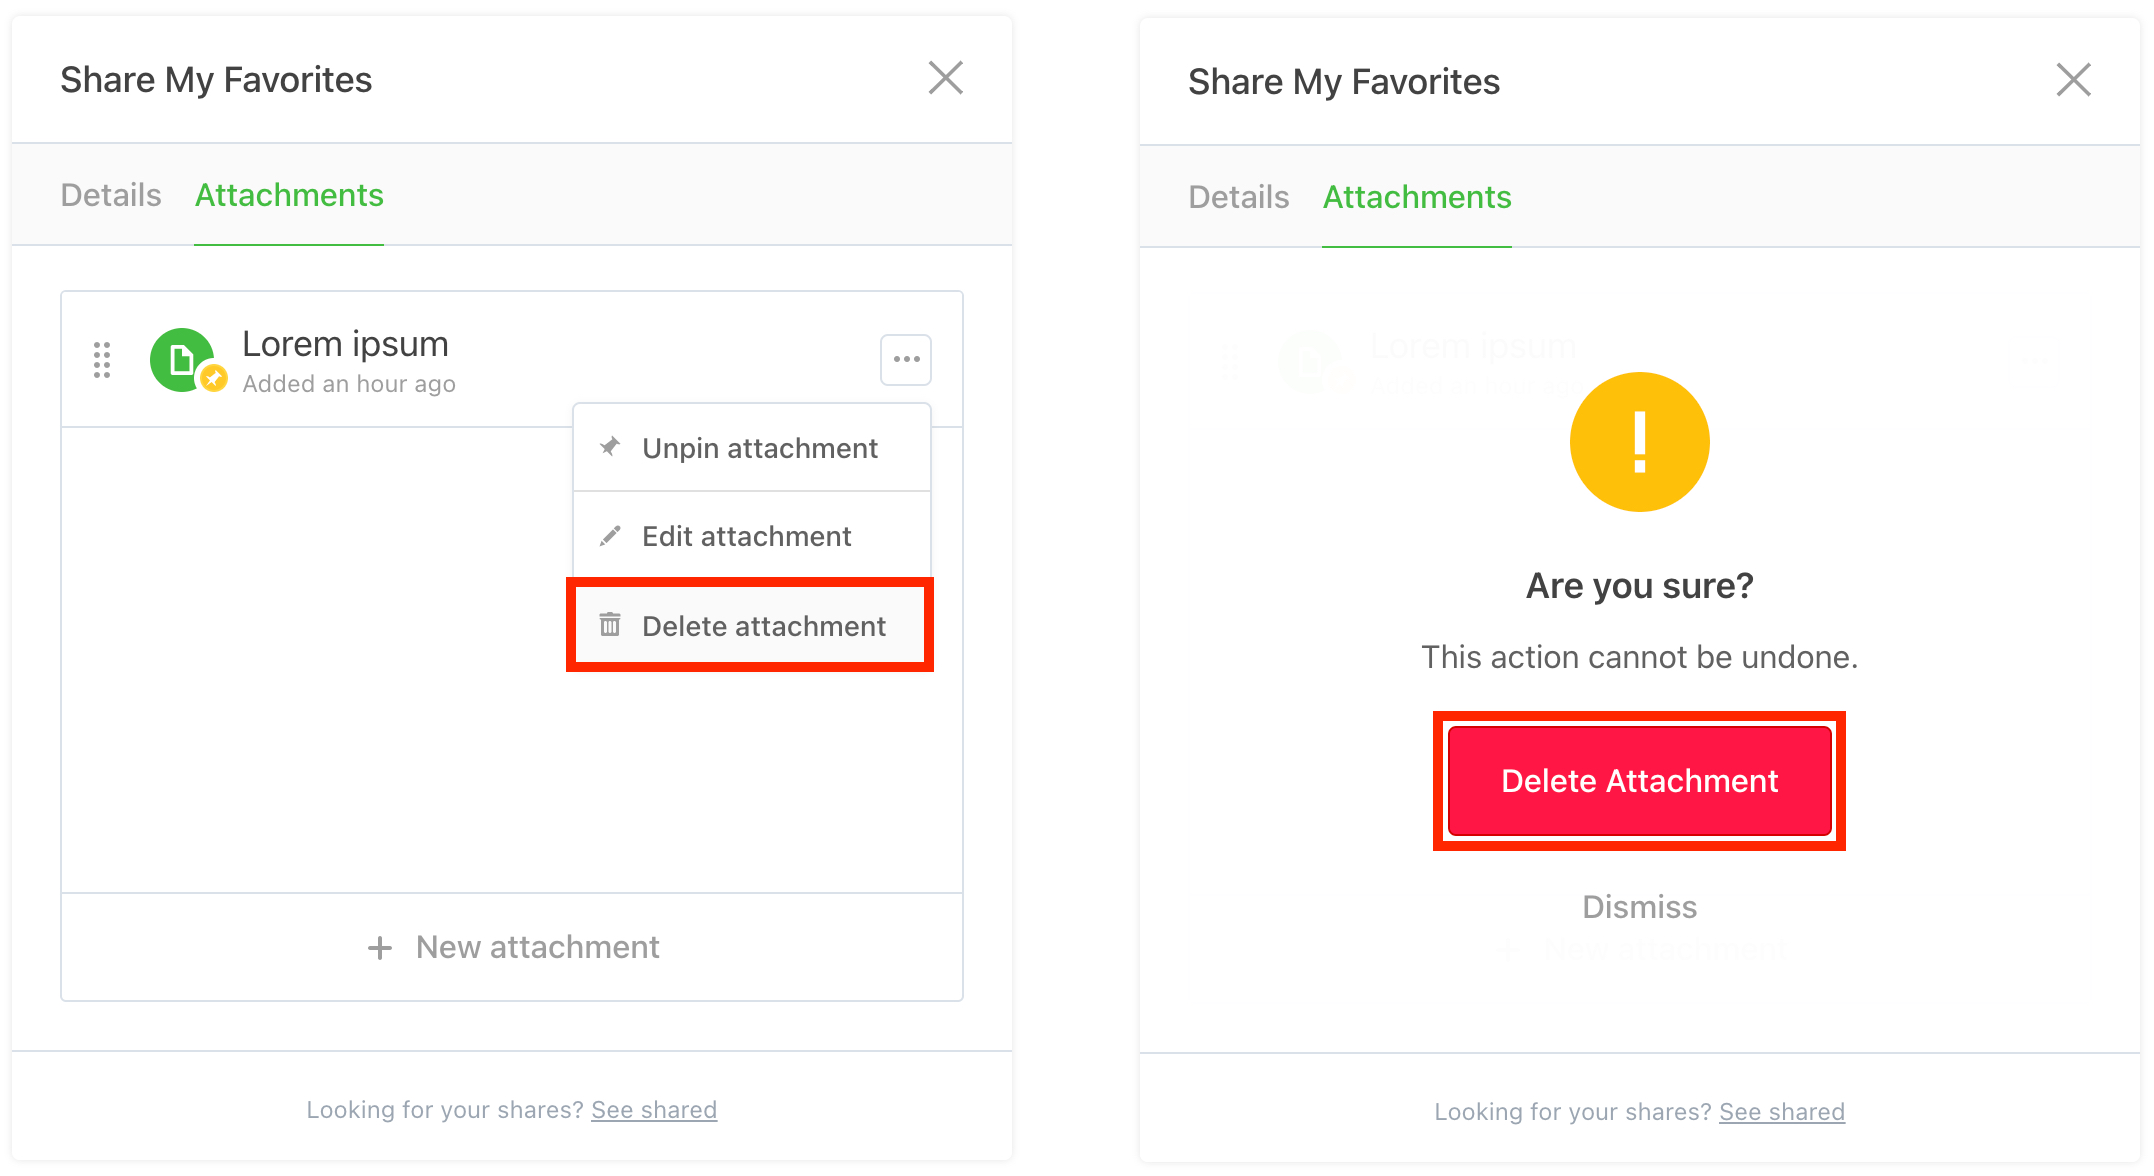
If you'd like to delete an attachment simply click the
••• button corresponding with the attachment you'd like to Delete from the Attachments dialog, then click the Delete Attachment button: